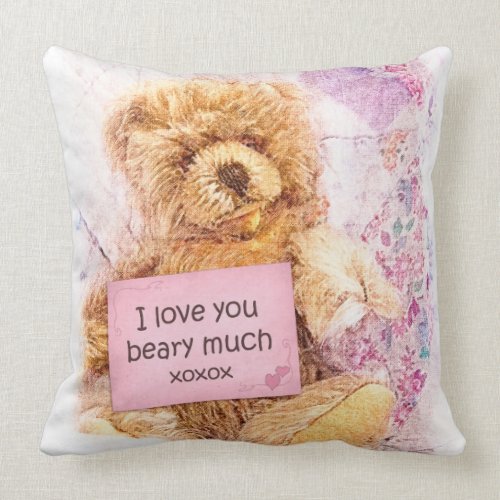
topNav

Author Archive | Debra Schmidt

Custom Skins for iPads, Kindles, iPhones, Androids and More!

Custom Skins

Colorful Spring Flowers Garden Art iPhone Skin musicskins_skinZazzle just announced the introduction of custom skins for “nearly 300 of the world’s most popular electronic devices made today (and more than a few classic ones as well).”

We – designers and customers – have been waiting for these!

There are custom skins for the brand new iPad and Kindle Fire, as well as all of the popular skins for iPhone and Android devices. And laptops, headphones, MP3 players, XBoxes and more! As of today, there are 270 electronics devices covered by available skins with more being added so check  back if yours isn’t available right now.

What are these skins like?

Zazzle describes them as “super-durable, ultrathin, re-peelable adhesive sheets” made with high quality patent-pending Avery adhesive vinyl. They are high gloss and easy on/off with no sticky residue.Pirate Penguin musicskins_skin

Want to create your own?

If you have a design of your own to upload, here’s the link to the Create Your Own Skins page. Once there, you will use the drop-down menus to

  1. Choose a device
  2. Choose a brand
  3. Choose a model
  4. Create!

Design Tips

You can use JPG, PNG, GIF, PDF or TIFF files when uploading your design for a custom skin. There aren’t any downloadable guidefiles yet, but it’s not hard to figure out the design tools. Be sure your image is at least 200 ppi and preferably equal to or larger than the skin size needed (unless, of course, you are going to be placing the design in a corner, or something!). I like to use sRGB colorspace. Don’t forget, a color-calibrated monitor will help ensure that what-you-see-on-your-screen-is-what-you-get.

In addition to adding your own photo or image, you can use any of the hundreds of Zazzle fonts to add your own words to a design. Some text ideas include:

  • Your name – or the giftee’s name
  • Business name
  • Contact info in case device is misplaced
  • Proud Dad
  • #1 Mom
  • Congratulations!
  • A favorite quote
  • A tagline or slogan
  • Don’t even think of touching this! (my favorite)

More Design Tips Just for Skins

This is Zazzle’s first product with multiple design areas that will be printed on multiple sheets, so it can be a little bit complicated. Some products will have front and back, others won’t. The design tools will help switch you between sheets as you add images to the top, front, left, back, etc.Caravans musicskins_skin

Look for the drop down box located in the customize section to see what all your options are. If you need some help, check out this Zazzle Skins Design Tool Tips & Tricks.

Don’t do this!

Zazzle will not print images that potentially violate intellectual property rights (see here). This means you can’t make skins with your own Disney or Twilight or Justin Beiber images. Or images you grabbed from Google. Or anything that might infringe. You would be surprised how sensitive some people and places are about having their picture used!

Make sure you use images for which you own the copyright or have permission (your mom will let you use her pictures most likely!) and you have the right to publish the content. Otherwise, you will do all the creating and your order will be cancelled. Not fun. You’ve been warned! 🙂

Delivery

Zazzle is PDQ (pretty darn quick) with most orders and says the skins should be on their way to you within 3-5 business days of your order. Don’t forget to check out the Zazzle Black program for free shipping in the USA.

Guarantee

If you don’t like it – whether you screwed up the design or Zazzle did or you designed the perfect skin for your girlfriend’s laptop and then she dumped you – Zazzle will take it back for replacement or refund within 30 days. Official policy here: Everything you want to know about Zazzle returns.

Check out Available Designs

There are already thousands of designs available in the Zazzle marketplace, so you have lots to choose from already and more every minute! Click any of the categories below to see beautiful / artsy / weird / sarcastic / fun / sweet designs on the shelves!Pale Horse Skull Paisely musicskins_skin


Want Custom Design Work?

Didn’t find what you were looking for?

Want something really custom for yourself or your business?

If you want custom skins  and would like to have it done for you, I can help you out – your design or one from one of  my stores placed on which product(s) you like.

Contact me for information and costs. If it’s one of my existing designs, the price is likely free!


Video

Iain McGilchrist: The Divided Brain (A TED Talk)

TED talks are as snackable and delicious as cupcakes, aren’t they?

If you’re here, you are likely interested in the junctures of left and right: creativity and rationality, art and commerce, and (perhaps) the neuroscience behind the divided brain theories. Perhaps even in the meeting of frosting and cake!

TED Talk: The Divided Brain

I enjoy hearing new points of view and information (that’s the right half of my brain scanning) and learning more about the world and how we operate within it. All that focus is my left hemisphere. My frontal lobe is now trying to tell me I’ve watched enough TED today, but I can’t resist sharing this many-layered presentation, The Divided Brain, by Iain McGilchrist about our brain hemispheres and the latest theories on how they work.

According to his bio on TED,

Iain McGilchrist is a psychiatrist and writer. Before he came to medicine, he was a literary scholar — and his work on the brain is shaped by a deep questioning of the role of art and culture. As his official bio puts it: “He is committed to the idea that the mind and brain can be understood only by seeing them in the broadest possible context, that of the whole of our physical and spiritual existence, and of the wider human culture in which they arise — the culture which helps to mould, and in turn is moulded by, our minds and brains.”

His deep background in Western culture is evidenced in this talk and wonderfully illustrated by RSA. If you haven’t watch them “cartooning” a presentation before, you’re in for a treat. You may want to stop the video and read the details in several places.

Do we live in a world that has become unbalanced in favor of the left brain while the living, breathing, real right brain has lost its place? What does that mean to art and artists and creatives of all types? Will all future creativity be directed towards video games for the left brain?

If you find this yummy TED “cupcake” of interest, you may want to check out the whole cake! See Iain McGilchrist’s book, The Master and His Emissary: The Divided Brain and the Making of the Western World.

Overview of Zazzle Fonts

As of today, Zazzle offers 308 fonts for designers to use. The default font is always Folio Medium: a realist sans-serif font that was designed by Konrad Bauer and Walter Baum 1957. It’s fine, but pretty bland, don’t you think? There are some grunge style and kid-friendly fonts as well as over four dozen script fonts,too. Over three hundred sounds like a lot of fonts, but it’s not really if you are concentrating on one grouping of design. I find there are never enough really bold ones or pretty ones.

There was an indication last year that new fonts were forthcoming, but don’t hold your breath. The only change I’ve seen in four years is the subtraction of two fonts!

Simply a guess here, but if Zazzle has to BUY fonts, they can be super expensive. And to make available for millions of Zazzlers and customers? Eeek! If you’ve paid for fonts before, you know you often get what you pay for. 🙂 But we all want some scrumptious wedding and holiday fonts. . .

Categories

The Zazzle fonts are divided into seven categories:

  • Blackletter (9)
  • Cool Fonts (52)
  • Decorative & Display (11)
  • Fun Fonts (144)
  • Picture (17)
  • Script (51)
  • Standard (78)

Depending what kind of products you design – and for whom – you will probably concentrate on a dozen or two of what’s available. There’s no master list: what you see when you add text to a product is THE list.

Font Sample Sheets

The downloadable font sheet once available in the Zazzle forums has been removed, unfortunately. I checked – the link is gone. No idea why! (Nah, nah – I have one. Somewhere. A dog-eared printed copy.)

You can make your own font sheets if you want to see how a whole character set looks. For some of the decorative fonts – or the ones you use regularly – this can be very helpful.

Did you know, for instance, that Old Dreadful had so many fun characters? I, myself, have not yet used it, but that was a mistake on my part! Its biggest drawback is readability with such variations between thick and thin lettering.

Old Dreadful font Example

Check out the Maritime font; there’s not much to it, but sometimes you just need a little bird in a corner. Note that the little boxes indicate characters unsupported in the font set.

Maritime font

Some of the other sheets don’t show all the characters, but this Folio Medium does. The Q is dirt-ugly, but that is one of the hallmarks of this font along with a square dot on the i; the rest of the letters are decent.

Folio Medium font

Did you realize that the beautiful Liorah prints dark and graceful and hogs up a lot of space? And the downward stroke of the letter J cuts off when it starts a line? It’s too iffy for monograms because many of the capitals will overlap one another.

Liorah font

The English Vivance font, on the other hand, does show a full J and has a pretty ampersand. The S is boring, which is too bad for Save the Date cards, but not a show-stopper. It’s useful to know what a font’s numbers look like, too: these are nice on invitations and places were you don’t need strictly vertical lettering.

English Vivance font

Allowable Characters

The box below shows Zazzle’s allowable characters: letters, numbers & symbols. Not all symbols are available in all fonts and Zazzle only allows Latin characters. If you want to make your own font sheets, you can copy this layout and paste it into a poster or flyer on Zazzle. (Or look for these on RightBrainLeftTurn on Zazzle). The sample sentences show every letter of the alphabet and whether “J” is apparently cut off – it’s a problematic letter on Zazzle, but people say that it PRINTS ok. Additionally, the sentences show you the leading (spacing) between lines. Some fonts have a lot more leading than you’d imagine!

ABCDEFGHIJKLMN

OPQRSTUVWXYZ

abcdefghijklmn
opqrstuvwxyz

1234567890

~!@#$%^&*()_+`-=
[]\{}|;:'”,./<>?`¡£¢§¶ªº
œ´®¥¨‘«åß©¬æç÷]

The quick brown fox jumps over the lazy dog.
Joyce the Bride & Joseph the Groom.

Formal Script Fonts

Below are sample sheets of the formal script fonts. If you’re doing invitations, script fonts are really key. These are set to 2.7 on the Zazzle font scale – which, BTW, doesn’t relate to anything else. Per Zazzle,

The font sizes we use are specific to the products and design engine on our site. Your product will resemble the real view offered on our site, so please refer to the Real View to be sure your text size is just as you want it.

formal script fonts 1-6

Script fonts 7-12

script fonts 13-18

Get your own!

You may find it very handy to download your own copies of some of the fonts so you can customize their appearance more and use them to accent your designs while still coordinating with the customizable text. As far as I know, all the Zazzle fonts are available for free somewhere or another – you probably have a few already on your computer. Here’s a good resource of public domain, free fonts where you’ll find many that match Zazzle’s: Eagle Fonts.

Here’s one of those scrumptious wedding fonts I mentioned drooling for. Just one version of it from MyFonts.com is $36 – not so bad, but the family is $86. And that’s for use by one company or household.

Here’s a truly mouth-watering site for designers: Letterhead Fonts. How easily could you spend your whole volume bonus there?

OK, interminable curiosity made me search for a really expensive font family. How about the beautifully quotidian Trinite´? $4,685 for one Mac user. No, I did not misplace a decimal! Whew. (shakes head) Probably not for Zazzlers!

However, if you want Zazzle to bring on new fonts, just spend a couple of days finding and printing samples of all the existing ones! It’s sure to happen then. 🙂

Happy designing!

Edited to add: I found a Squidoo lens by vgsuperheroine where she has created a pdf of the Zazzle fonts for you to download: List of Zazzle Fonts.

Planning title and tagline font combinations for your website

You don’t have to create a logo on your website! On WordPress, for instance, you can use built-in fonts to create a sharp title and tagline combination. Oh, you’ve been doing it that way, already? It’s not Arial / Arial / Arial, is it? I hope not!

But you probably know you can can waste WAY too much time creating font combinations for websites.

If your WordPress theme, for instance, gives you dozens of Google fonts and embedded fonts to choose from, do you try all of them? Or just stick with the default?

The Web Font Combinator screenshot

The Web Font Combinator screenshot


Font Combination Tool

I found a sweet tool the other day to test out combinations of fonts: the aptly named The Web Font Combinator by Chip Cullen.

You can change the title line, tagline and paragraph text to your own words or just leave the default. Then start trying out different fonts in combination with each other. Handily, you can adjust the font sizes and the line height of the body text. You can also reverse from black-on-white to white-on-black. Or check out the punk version in yellow and pink.

According to the site “Currently this tool only uses fonts supplied by the Google Font Directory, as well as a handful of common system fonts.” I found that the theme I was using didn’t support all those fonts, so I checked back and forth.

Without going into guidelines for typography ( I couldn’t go far, if I wanted to), consider how you will often see a bold font title with a smaller font tagline in a lighter color below. The tagline is more often italicized than the main text. Your body text needs to be really readable unless your posts are super-short. Arial, Garamond, Verdana, Helvetica and other system fonts are safer bets.

The width I was playing with on my 15″ laptop was about 860 pixels. If your site is 960px across (a standard size), this is a good width to judge how well our text will actually appear on the screen. You probably will not want to use two lines as I did in the example above.

Try it out for yourself – did you come up with any surprises? I started liking Rock Salt, myself.

Warning!

It’s much easier to create BAD combinations, so be careful with cutesy fonts or you could get something like this!

cutesy fonts look bad

cutesy fonts are difficult to combine!


Change the Nasty Yellow Promo Bar on Your Zazzle Storefront

Yellow promo bar on Zazzle site

Existing yellow promo bar on Zazzle site

Thanks to info from Retropolis_Travel and Stalldoortees in the Zazzle forums, it’s easy to revise the appearance of the yellow promotion bar (also called the nasty yellow bar for its unfortunate hue) at the top of your Zazzle storefront.

UPDATE: Zazzle wrote in the forums that storekeepers are not to remove or change this bar! So, take your chances if you mess with it. I don’t know of anyone who had the store taken down for changing the color, but it could happen. Do this at your own risk! 🙂
Instead of your storefront header showing the yellow bar like the Paper Lake header above, it could show a gray bar like this:

PaperLake store taupe bar

PaperLake store taupe bar

or a light taupe-colored bar like this:

Paper lake store header with light taupe promo bar

Paper lake store header with light taupe promo bar

Am I stuck with the infamous Yellow Bar?

The yellow bar is there most days with ever-changing information and codes for sales. So – you and your customers WANT that bar, you probably just don’t want it in #FFFB9C yellow. You can try any light color that will coordinate with your store and still allow the black, blue and red text to be read. Truthfully, though, if it coordinates too well with your store, customers may not notice it.

IF you are comfortable going into the CSS coding of your store, you can do this easily. If you’re not comfortable, COPY everything there first or use a “Sandbox” store. If you mess it up, you could make your store ugly or, worse, inoperable.*

Replace with plain color bar

Note: edited 3/1 to show the CSS code as code. If you copied it as text previously, the dashes may have turned to a solid line, giving you a parse error.

Follow this sequence in the backend of your Zazzle store to get to the right section:

Store > Appearance > Edit Appearance > Beta Appearance tab > Style (CSS) section

You can place the code anywhere in the CSS, as long as it’s after the first line or before the last line. Try adding it at the top, right below the first line, which should read:

<z:csstemplate id=”csstemplate” live=”true” xmlns:z=”urn:zazzle:api”>

Note: Any code like this /*——text here——-*/ is simply commenting info to serve as a reminder of what’s supposed to be happening. (No, none of us remembers everything we think we will!)

/*-----------------------
| Change BG color of sale promo, adjust overflow, reset font to Arial
------------------------------*/
#headerPromoBar
{
background-color: #F3F5EA !important;
white-space: nowrap !important;
overflow:hidden !important;
font-family: Arial, Helvetica, sans-serif
}

Copy this bit of CSS code and paste it into your store’s CSS box. You can replace the background color #F3F5EA with your own choice of color. (The #F3F5EA is the color I used on my Beachwalker storefront; a light cream.) Then hit the orange validate and save button. If the code validates, you likely did everything right – go check out your revised store front! If not, make sure you didn’t drop the opening or closing curly bracket.

 Sample colors that work

Here’s a few colors I’ve used that you can try. For more information on picking a color from your store, try reading Colorzilla is a great tool for designers.

  • white #FFFFFF
  • cream #F3F5EA
  • light gray #D3D3D3
  • taupe #ACAFA8
  • light blue #D0DDEE

If just changing the color doesn’t do it for you, keep reading!

Replace with your own image

Some Zazzlers customize the promo bar by adding their own image, as UTeeZSF has done here:

UTeeZSF header with image replacing yellow bar

UTeeZSF header with image replacing yellow bar

To achieve this, you need to have your own image hosted online.  Drop that image URL into the code below to add a background image.

/*-------------------------------------------
| Change BG color of sale promo, adjust overflow, reset font to Arial
---------------------------------------------*/
#headerPromoBar
{
background-color: #DABA9A !important;
background-image:url(YOUR IMAGE URL) !important;
white-space: nowrap !important;
overflow:hidden !important;
font-family: Arial, Helvetica, sans-serif
}

That’s all there is to it! Easy, isn’t it? If you changed your promo bar, what color did you end up using?

*Use this code at your own risk. I may have incorporated a typo. You may incorporate a typo. Zazzle could have changed the code by the time you read this – trust me, THEY DO CHANGE THE CODE. Play it safe: try it out in a sandbox store or backup your original code!

Video

Download your Zazzle product images 75x faster to more quickly create custom advertising

Do you create custom category folders to show off your Zazzle products? Or use your product images on Facebook, a blog or another social media site? Or to create Zazzle advertising banners for your site or blog? Or showcase your designs on your Zazzle store header?  To showcase your products effectively, you need to show them!

But you may be doing what I’ve done in the past: taking various size screenshots of all the desired product images and then placing them into Photoshop (or other graphics software). The screenshots all have useful names like this does:

product image

Screen shot 2012-02-14 at 1.06.32 AM

Another – better – way is to download as many as 75 product images simultaneously where Zazzle assigns the product name to each image for you. What a time and trouble saver!

To see how this works and examples of instances where you would use the images, check out this video. And please excuse the wayward mouse pointer – I just got it and we’re getting used to each other!

Zazzle announces rare price increase – on new Rickshaw bags

Stylized Bright Pink Heart Pattern rickshawmessengerbagCiting raw material cost increases, Zazzle.com announced a price increase in the forums today:

As of midnight last night, we increased the price of all Rickshaw products to keep in step with the dramatic rise in the cost of raw materials used to manufacture these cut and sew products. As everyone is aware, we do not do this often, but we are committed to this new and rapidly-expanding product line and felt the increase wouldn’t jeopardize their sales

The new base price of the bags is $85.95, so expect to see many of them priced over $100! So many of us Zazzlers fell in love with these bags and have been planning to buy our own, so this will hit us, too. It was particularly surprising as the bags have only been available since mid-January! I only remember one or two other Zazzle price increases in nearly four years of Zazzling, so this is a rare event as Eric mentioned in the forums.

Although cotton prices doubled in 2010 after natural disasters badly affected crops in Asia and Australia, prices fellback steeply since March of 2011 as production increased and demand fell per Commodity Online.

While cotton producers may shift into higher paying crops in 2012-13, thereby decreasing the global cotton production, the timing of this particular price increase was a little surprising.

Presumably then, it’s some other raw material. I hope so, because all the new products announced last night are made of cotton!

New product launch on Zazzle! Pillows, kitchen towels, placemats and napkins!

A low key announcement by Zazzle.com late tonight has got the late-night designers firing up the coffee pots! Zazzle has released four new products in connection with a new partnership with American Mojo.

American MoJo products are produced by sustainably employed single moms in the USA and contribute to breaking the cycle of poverty for single moms and their children.

Introduced tonight are

  • square and lumbar cotton couch pillows
  • cotton kitchen towels
  • cotton dinner and cocktail napkins (in sets of 4 each)
  • cotton placemats

Here’s what the new products look like with coordinating dots & lines designs:

Kitchen Towels starting at $15.95

American Mojo custom kitchen towelPlacemats, starting at $19.95
American Mojo custom placematNapkins, dinner sets starting at $44.95 and cocktail sets starting at $34.95.
American Mojo custom dinner napkinAmerican Mojo custom cocktail napkin

Pillows, square starting at $59.95 and lumbar starting at $49.95

American Mojo custom square pillowAmerican Mojo custom lumbar pillow

Are these prices a bit high? Not so much when you consider that each is custom made in America and there are NO MINIMUM orders. And these prices, truthfully, are just the starting prices. Many designers will choose to set their prices much higher. But you will be able to get really custom home decor items that you not only don’t have to sew yourself, but with a custom design as well!

I would like to feel the weight and “hand” of these myself. Eventually!

Also worth noting, all items are printed edge to edge, giving you the most design flexibility and the pillows, which are a good size compared to others on the market, are printed on both sides.

Here’s my first pillow to show you that!

Front side:
Teddy Bear I Love You and Bear Hug throwpillow
Reverse side:
Teddy Bear I Love You and Bear Hug throwpillowNow I’m off to design a few more before going to bed!

If you want to try your hand at, click on any of the dots & lines images above to be taken to create pages (affiliate links).  Give it a shot! It’s fun and – you never know – you could be Zazzle-happy yourself in no time!


Colorzilla is a great tool for designers

colorzilla tool imageColorzilla is a great little tool that sits up at the top of your browser window and lets you take color readings from any point in the browser window.

With this tool, you can easily pick a color out of your photograph or design image as you work on Zazzle (or any other POD) and use the result to give your text, border or background the best coloring. It makes a huge difference to your finished product!

Here’s a six step process of using Colorzilla to color some text using a candy jar.

STEP 1:

Start with default color text and chosen image on product, here a candy jar.
jar with default color text

STEP 2:

Switch to design view and use the magnify glass to see a close-up of the design.

candy jar
STEP 3:

Click on the Colorzilla eye-dropper and touch the point to a desired color within your design.

circles

STEP 4:

Click the drop down arrow on the Colorzilla tool and choose the Hex color without the pound sign. That will copy the number for you.

choose option

Step 5:

Open the text color box. Paste the new color number that you just copied over the old one and hit return to lock it in.

jar with default color texthex color

Step 6:

Check out the new color on your text in the product view. Good? OK, you’re done! It is a big improvement!

finished candy jar

With Colorzilla, giving your products a finishing professional touch is a lot easier! It’s available as a free add-on for Firefox or Chrome. Or you can go to Colorzilla to download it.